A minimum 3 NICs are required and will be broken down like so:
- eth0 – Public / External Interface facing Internet
- eth1 – Management interface used for Cluster sync. Can also be used for security management server communication
- eth2 – First internal interface. Usually faces internal servers & load balancers. Can be used for security management server communication
The Deployment launch template has a few fields which aren’t explained very well…
Security Management Server address
A static route to this destination via management interface will be created a launch time. If the Security Management server is accessed via one of the internal interfaces, use a dummy address here such as 1.2.3.4/32 and add the static routes after launch.
SIC key
This is the password to communicate with the Security Management server. It can be set after launch, but if already known, it can be set here to be pre-configured at launch
Automatically generate an administrator password
This will create a new random ‘admin’ user password to allow access to the WebGUI right after launch, which saves some time especially in situations were SSH is slow or blocked.
Note – SSH connections always require public key authentication, even with this enabled
Allow download from/upload to Check Point
This will allow the instance to communicate outbound to Checkpoint to check for updates. It’s enabled by default on most CheckPoint appliances, so I’d recommend enabling this setting
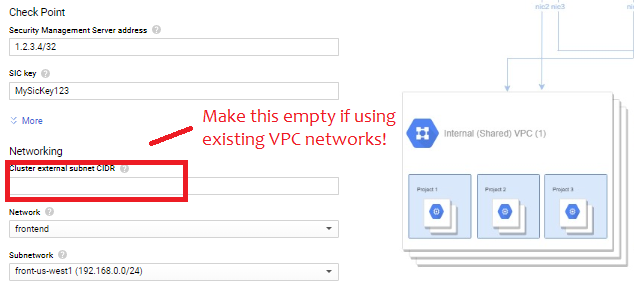
Networking
This is the real catch, and a pretty stupid one. The form fills out these three subnets:
- “Cluster External Subnet CIDR” = 10.0.0.0/24
- “Management external subnet CIDR” = 10.0.1.0/24
- “1st internal subnet CIDR” = 10.0.2.0/24
If using an existing network, erase the pre-filled value and then select the appropriate networks in the drop-down menus like so:
Also, make sure all subnets have “Private Google Access” checked
Post-launch Configuration
After launch, access the gateways via SSH using public key and/or WebGUI to run through initial setup. The first step is set a new password for the admin user:
set user admin password
set expert-password
Since eth1 rather than eth0 is the management interface, I would recommend setting that accordingly:
set management interface eth1
I would also recommend adding static routes. The deployment will create static routes for RFC 1918 space via the management interface. If these need to be overridden to go via an internal interface the CLI command is something like this
set static-route NETWORK/MASK nexthop gateway address NEXTHOP_ADDRESS on
Before importing in to SmartConsole, you can test connectivity by trying to telnet to the security management’s server address on port 18191. Once everything looks good, don’t forget to save the configuration:
save config
Cluster Creation
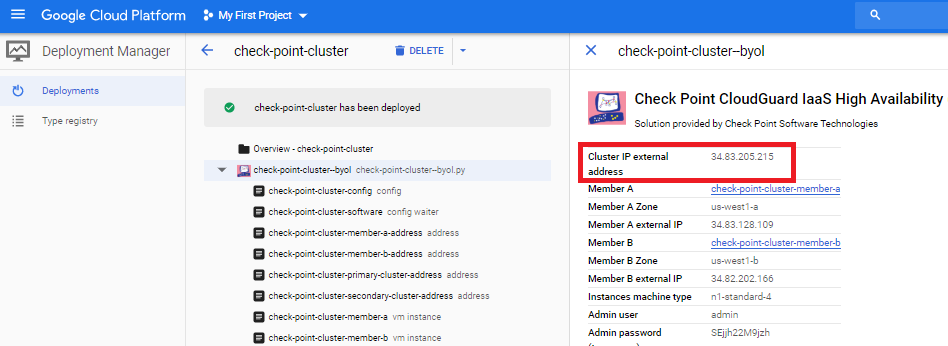
In SmartConsole, create a new ClusterXL. When prompted for the cluster address, enter the primary cluster address. The easy way to find this is look the the deployment result under Tools -> Deployment manager -> Deployments
Then add the individual gateways with the management interface. Walking through the wizard, you’ll need to define the type of each interface:
- Set the first (external) interface to private use
- Set the secondary (management) interface as sync/primary
- Set subsequent interfaces as private use with monitoring.
Note the wizard tends to list the interfaces backwards: eth2, eth1, eth0

The guide lists a few steps to do within the Gateway Cluster Properties, several of which I disagree with. Instead, I’d suggest the following:
- Under Network Management, VPN Domain, create a group that lists the internal subnets behind the Checkpoint that will be accessed via site-to-site and remote access VPNs
- On the eth1 interface, set Topology to Override / This Network / Network defined by routes. This should allow IP spoofing to remain enabled
- Under NAT, do not check “Hide internal networks behind the Gateway’s external IP” as this will auto-generate a NAT rule that could conflict with site-to-site VPNs. Instead, create manual NAT rules in the policy.
- Under IPSec VPN, Link Selection, Source IP address Settings, set Manual / IP address of chosen interface
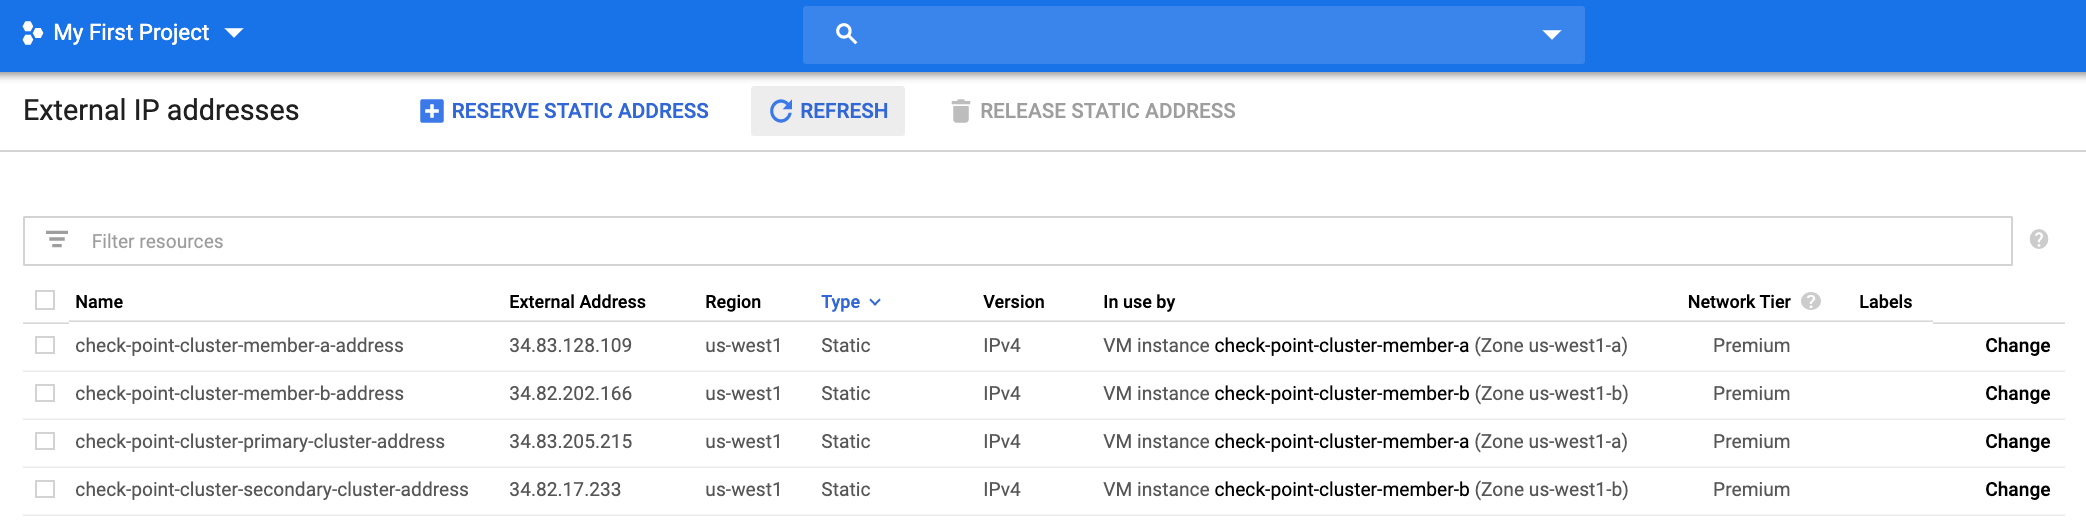
Do a policy install on the new cluster, and a few minutes later, the GCP console should map the primary and secondary external IP addresses to the two instances
Failover
Failover is done via API call and takes roughly 15 seconds.
On the external network (front end), the primary and secondary firewalls will each get external IP address mapped. CheckPoint calls these “primary-cluster-address” and “secondary-cluster-address”. I’d argue “active” and “standby” would be better names, because the addresses will flip during a failover event.
On the internal network (back end0, failover is done by modifying the static route to 0.0.0.0/0. The entries will be created on the internal networks when the cluster is formed.
Known Problems
The script $FWDIR/scripts/gcp_ha_test.py is missing
This is simply a mistake in CheckPoint’s documentation. The correct file name is:
$FWDIR/scripts/google_ha_test.py
Deployment Fails with error code 504, Resource Error, Timeout expired

Also, while the instances get created and External static IPs allocated, the secondary cluster IP never gets mapped and failover does not work.
Cause: there is a portion of the R80.30 deployment script relating to external IP address mapping that assumes the default service account is enabled, but many Enterprise customers will have default service account disabled as a security best practice. As of January 2020, the only fix is to enable the default service account, then redo the deployment.
StackDriver is enabled at launch, but never gets logs
Same issue as a above. As of January 2020, it depends on the default service account being enabled.
